Introduction
After we complete this article the final code in TrapPoints_v008.zip will allow you to move points and see them redrawn in real-time on the canvas.
This article continues the work that we've been doing in the two previous articles published here at CP:
Algorithm : Calc Convex Hull & Draw HTML5 Canvas (Part 1 of 2)[^]
Algorithm : Calc Convex Hull & Draw HTML5 Canvas (Part 2 of N)[^]
What This Article Will Cover
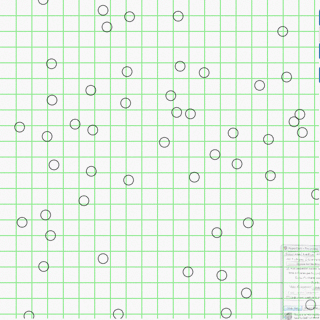
- adding a button and functionality to create randomly generated points
- make it so you can move points -- seems like an interesting challenge
Note: Okay, I'm getting to the convex hull algorithm. But, all this drawing stuff got to me. :)
See Live Version
Try the live version which includes these updates at:
http://raddev.us/TrapPoints[^]
Background
All of the work done in these articles is inspired by my reading the book : Amazon.com: Algorithms in a Nutshell: A Practical Guide (9781491948927): George T. Heineman, Gary Pollice, Stanley Selkow: Books[^]
It's a very interesting book and I've only made it as far as this first algorithm but it's quite readable.
HTML5 Canvas
I wanted a good way to examine how to go about solving this algorithm and HTML5 Canvas provided me the most ubiquitous graphics drawing functionality that is well-documented and
Step 7 Begins Here
Add Auto-Generation of Points
You can see the completed code by downloading TrapPoints_v007.zip at the top of this article.
This is a very easy task. First of all we just add a new Bootstrap-styled button so we can run the functionality.
The HTML will look like the following:
<button onclick="generateRandomPoints(50);" class="btn btn-primary">Generate Points</button>
I set up the onclick to call a method named generateRandomPoints() which takes the number of points we want to generate (in this case 50).
generateRandomPoints()
This method is very easy to implement.
function generateRandomPoints(pointCount){
clearPoints();
for (var i = 0; i < pointCount;i++){
var X = Math.floor(Math.random() * CANVAS_SIZE);
var Y = Math.floor(Math.random() * CANVAS_SIZE);
var p = {};
p.x = X;
p.y = Y;
allPoints.push(p);
}
draw();
}
The first thing we do is call the clearPoints() method, which we wrote in the previous article. That method clears our allPoints and selectedTriangle point arrays, since those points won't be valid any longer.
After that, we loop through some code for each point that we want to create.
As we loop through we simply generate a random value using the built-in JavaScript method Math.random(). Math.random() generates a double value Z where 1 > Z >= 0.
I've added a new constant* to the top of trappoints.js which looks like : var CANVAS_SIZE = 650;
Since this value represents the max height and width of the canvas I never want to exceed these values.
Generating X and Y Values For a Point
Also, notice that we implement another built-in JavaScript method (Math.floor()) when generating our values.
The Mozilla Developer Network docs describes that method as:
Quote:
The Math.floor() function returns the largest integer less than or equal to a given number.
This just insures the value is always an integer since it simply truncates any decimal value (no rounding of the integer value).
*JavaScript doesn't support the keyword const across all browsers so I'm just creating a var and calling it a const.
We generate two different values using this random method (one for the x value and one for the y).
We assign each of those values to a local variable, generate a local point object out of the two values and then push the new point on the allPoints array. The loop runs and generates a point each time throuhg.
Finally, when all the points are added to allPoints, we call the draw() method one time, which draws them all on the canvas.
Step 8 Begins Here
You can see the completed code by downloading TrapPoints_v008.zip at the top of this article.
Allow User To Move a Point
Now, we want to allow the user to move a point. This one intrigues me because I think the end result will look cool, but I don't believe it will be too difficult.
Use Ctrl Key
Since I used the Shift Key to allow user to highlight points for the selected triangle I am now going to use the Ctrl key to indicate that the user is moving a point.
Adding the code is quite easy. All we have to do is go to the mouseDownHandler() function and add the following code to the if...else... statement:
else if (event.ctrlKey){
            console.log("control key is pressed...");
        }
If you add that code and then run again, you will see that if you hold the Ctrl key down and click anywhere in the grid then no point is drawn. Instead, just a message is out put to the web browser's console window.
We'll fill in the code to do the work in a moment.
Redraw Point As User Drags It On Canvas
The really cool feature is for the user to see the point being dragged around on the canvas so I want the point that is being moved by the user to continually redraw it until he lets go of his mouse button.
To do that work we need to add a mouseMove handler. Let's do that now.
Go back to the initApp() method which we wrote in the first article and add one line (bolded in the code below)
function initApp()
{
    theCanvas = document.getElementById("gamescreen");
    ctx = theCanvas.getContext("2d");

    ctx.canvas.height  = CANVAS_SIZE;
    ctx.canvas.width = ctx.canvas.height;

    window.addEventListener("mousedown", mouseDownHandler);
    window.addEventListener("mousemove", mouseMoveHandler);
    initBoard();
}
With that we've registered a new method (which we will write the implementation for) named mouseMoveHandler.
Summary of How Point Moving Should Work
Here's my idea of how all this will hopefully work. If the user's Ctrl key is down and the user clicks a spot on the Canvas, then we'll hit test the point where the user has clicked. That's basically the same code we ran when the user is highlighting points for the selected triangle (see more in the 2nd article).
If a point is hit then we'll do something a little different this time. Previously we just returned a point with the same coordinates and then we drew a highlighted (red) circle over the original one. That worked well enough.
Moving One Point Means Redrawing Grid and All Other Points
However, now we want to draw over the one that we are moving (to erase it) and then redraw it every time it is moved. That means we actually have to redraw the background and all the other points also. We know that the draw() method currently does that so that will help.
We only want to do this when the user has captured a point (Ctrl key is down and hit test returns a point). Also, we need to stop doing this work when the user let's go of the mouse button (mouseup). That means we actually have another mouse event handler we need to be notified of so let's go add it in the initApp() method too. It'll look as simple as this one line for now.
window.addEventListener("mouseup", mouseUpHandler);
The code in the mouseDownHandler() in our new else if {} clause will be very small so I'll show you the final version now.
else if (event.ctrlKey){
            isCtrlKeyPressed = true;
            hitTest(currentPoint);
        }
I've created a new global flag called isCtrlKeyPressed as a simple way to determine if we are handling this point move code. I've added that variable to the top of the trapponts.js and set it to false by default.
When the user presses the Ctrl key and clicks the mouse I set it to true and then we call our hitTest() method to determine if we hit a point that is on the grid. Notice that in this case we don't care about the returned point since the mouseMoveHandler is going to take over and do some work when the Ctrl key is pressed.
Altering the hitTest() Method
To do this move point work I need to alter the hitTest() method just a bit. It's the easiest way to alter the code to do our work. First I'll show you the code and then explain what it does.
function hitTest(p){
for (var x = 0;x<allPoints.length;x++){
if ((Math.abs(p.x - allPoints[x].x) <= RADIUS) && Math.abs(p.y - allPoints[x].y) <=RADIUS){
console.log("It's a hit..." + allPoints[x]);
if (isCtrlKeyPressed){
capturedIndex = x;
selectedTriangle = [];
isCtrlKeyPressed = false;
}
return allPoints[x];
}
}
}
I added the if statement bolded in the previous code sample. In previous versions I simply returned the point which was hit. Now, I set a global variable named capturedIndex to the current index of the point which was found in the allPoints[] array. This is a simple way to provide a value outside of this method and a bit of a cheat.
Reset Selected Triangle
You can see that I also set the selectedTriangle to null so that all the red highlighted points will be gone. I didn't want to deal with updating the selected triangle too so I just reset it. I can always do that work later and for now this is good enough. It's not that big of a deal for the user to selecte three points again.
After that I set the isCtrlKeyPressed back to false because we no longer need that value and it will be set again if the user clicks again.
Now, the code gets really fun and really easy. It is really easy code because we have somewhat of a framework built from our functions.
Framework of Functions Support Our Work
The only other code implemented is for the onMouseMove and onMouseUp methods and they are very simple.
The onMouseUp simply sets the selectedIndex = null to indicate that nothing is selected and mouseMove need not process because the user has not selected any points to move.
The entire method looks like the following:
function mouseUpHandler(event){
    capturedIndex = null;
}
mouseMoveHandler Is Quite Simple
Because of the work we've done before this, the mouseMoveHandler is much simpler than I expected it to be.
function mouseMoveHandler(event){
    if (capturedIndex !== null){
        allPoints[capturedIndex] = getMousePos(event);
        draw();
    }
}
All we have to do is check to see if the capturedIndex value is not null. If it is then we know a point has been captured in the hitTest() method.
We then get the current mouse position by calling our getMousePos() (each time the mouse moves it gets updated) and we set the original index of the point in the allPoints[] array to this new point value. That updates it's x & y values. After that we call draw() which will draw the background and all the points in allPoints[] array every time the mouse moves. That effectively makes the point look as if it is moving around on the grid.
All because our previous methods were written compactly we were able to add this work without destroying everything we did previously.
That's it for this time.
Keep on learning, keep on coding.
History
First version of this article and the two included code versions (step 7 & 8): 04-27-2016


 General
  News
News  Suggestion
  Question
  Bug
Bug  Answer
  Joke
Joke  Praise
  Rant
Rant  Admin
Admin 


