Part 2 – Extending AngularJS to Make It More Simple and Dynamic
In the previous article, we talked about some boilerplate code and issues that each developer has to face to work with Angular implementation and we also worked to abstract this common work into base services and controllers to come over these limitations. The main benefit of this approach is we can have core feature implementation of application in base so that it's easily available to developers wherever they want.
Following were the key benefits we achieved so far:
- Developer don’t have to inject any dependencies explicitly
- Common services can be made available anywhere required using
ServiceLocator pattern implementation. That will reduce the time and effort of defining dependencies all over the application. - Since core logic is inside the base classes, the developer is forced to adhere to application standards rather than implementing it in their own way.
By the end of this article, we will have achieved:
- Loading Services on demand from server (lazy-loading)
- Simplifying components development similar to controller and services we did in the last part
It can be a long talk, if I try to explain need of every design element, hence I’m going to keep the discussion to the point. Otherwise, you can just download the source code and start playing around with it to get to know it deeper and even extend it further to make it work for your design the way you want.
Loading Services on Demand from Server (Lazy-loading)
Generally, small applications don’t really have to worry about this feature, you can just make sure all of your services are loaded at the page load. If your application is huge with lots of services being injected, then it makes total sense to have this implementation.
In the previous article, we worked together to implement ServiceLocator that acts as service provider for all the application needs. This approach is going to help us to implement lazy loading of any service form server easily.
Here is the example of service implementation before applying lazy loading of Service1 file from server with our previous work.
class Service1 extends BaseService {
    GetItems(): angular.IPromise<string[]> {
        return this.Http().get("/api/products");
    }
}
class ServiceLocator extends BaseService {
    Service1(): Service1 {
        return this.Injector().get<service1>("Service1");
    }
}
class HomeController extends BaseController<ihomescope>{
    Init(): void {
        this.Scope.Items = ["I", "was", "loaded", "synchronously"];
        this.Services().Service1().GetItems()
            .then((result) => {
                this.Scope.Items = result.data;
            });
    }
}
There are many ways to load files from servers, here I’m going to use ocLazyLoad library. Let’s add Load method to BaseService that will take care of loading the service from the server. This Load method will take the service name which also depicts the service file name and tells to ocLazyLoad library to load it from location /apps/services. You can use the path from your application directory structure.
protected Load(service: string): ng.IPromise<any> {
    var lazy = this.Injector().get("$ocLazyLoad") as oc.ILazyLoad;
    return lazy.load("/apps/services/" + service + ".js")
        .catch((reason) => {
            throw service + " " + reason.description;
        });
}
If you notice loading file from server is async process, that means we cannot perform Service1().GetItems() call anymore, because on accessing Service1() method, we first have to load file from server then only developer should be able to access service in their implementation.
Workaround to this is we now have to get the action from the caller and execute it only once promise completes. Let's add helper method Invoke that will call our Load method and also handle the promise to execute action.
protected Invoke<t, u="">(service: string, action: (service: T) => ng.IPromise<u> | U):
        ng.IPromise<u> | U {
    return this.Load(service)
        .then<u>((): ng.IPromise<u> | U => {
            return action(this.Injector().get<t>(service));
        });
}
Putting this all together out BaseService, ServiceLocator and HomeController code showed above will finally look like:
abstract class BaseService {
    static $inject = ["$http", "$rootScope", "$injector"];
    private _http: angular.IHttpService;
    private _rootScope: angular.IRootScopeService;
    private _injector: angular.auto.IInjectorService;
    constructor(http: angular.IHttpService, rootScope: angular.IRootScopeService,
                   injector: angular.auto.IInjectorService) {
        this._http = http;
        this._rootScope = rootScope;
        this._injector = injector;
        this.Init.bind(this);
        this.Init();
    }
    Init(): void { }
    Http(): angular.IHttpService {
        return this._http;
    }
    RootScope(): angular.IRootScopeService {
        return this._rootScope;
    }
    protected Injector(): angular.auto.IInjectorService {
        return this._injector;
    }
    protected Load(service: string): ng.IPromise<any> {
        var lazy = this.Injector().get("$ocLazyLoad") as oc.ILazyLoad;
        return lazy.load("/apps/services/" + service + ".js")
            .catch((reason) => {
                throw service + " " + reason.description;
            });
    }
    protected Invoke<t, u="">(service: string,
          action: (service: T) => ng.IPromise<u> | U): ng.IPromise<u> | U {
        return this.Load(service)
            .then<u>((): ng.IPromise<u> | U => {
                return action(this.Injector().get<t>(service));
            });
    }
}
class HomeController extends BaseController<ihomescope>{
    Init(): void {
        this.Scope.Items = ["I", "was", "loaded", "synchronously"];
        this.Services().Service1((service) => {
            service.GetItems()
                .then((result) => {
                    this.Scope.Items = result;
                })
        });
    }
}
Now you can see without having to do much code change we achieved to load service file on demand.
TypeScript Decorators
Before moving to our next topic for components, I want to add a small thing to make it more interesting. Since components are a little tricky to implement the way we have implemented services and controller, Component is a mixture of both and has more capabilities to it.
That is where TypeScript decorator feature will help us to simplify defining components and minimize the coding efforts related to it. The reason I’m going to talk about TypeScript Decorator is because it adds more value to the JavaScript generation and runtime object creation. I recommend you read about how decorators work before reading any further.
Now that you know what it does, one can easily think of its usage with respect to AngularJS. We haven’t really talked before how you register any objects in Angular to make it work with framework.
class HomeController extends BaseController<ihomescope>{
   . . .
}
angular.module("portal").controller("HomeController", HomeController);
Let’s create decorator to handle that as well so that developer doesn’t really have to worry about registering it in Angular.
function Service(name: string) {
    return (target: Function) => {
        angular.module("portal").service(name, target);
    };
}
function Controller(name: string) {
    return (target: Function) => {
        angular.module("portal").controller(name, target);
    };
}
Now this can be used on any service and controller we want to register with our Angular module.
@Service("Service1")
class Service1 extends BaseService {
    GetItems(): angular.IPromise<string[]> {
        return this.Http().get("/api/products");
    }
}
@Service("ServiceLocator")
class ServiceLocator extends BaseService {
    Service1<t>(action: (service: Service1) => ng.IPromise<t> | T): ng.IPromise<t> | T {
        return this.Invoke("Service1", action);
    }
}
@Controller("HomeController")
class HomeController extends BaseController<ihomescope>{
     . . .
}
That’s it; amazingly, the decorator will take care of registering your functions at runtime. Basically, we have pretty much isolated Angular dependencies from developer’s hand.
Simplifying Components / Directives
Let’s talk about components (and directives) in AngularJS and see what area of it we can improvise similar to what we did for Controllers and Services. Below is a simple snippet of how components are defined normally.
interface IMyComponentScope extends IScope {
    Items: string[];
}
angular.module('portal').directive("MyComponent", function () {
    controller.$inject = ["$scope", "Service1"];
    var controller = function ($scope: IMyComponentScope, Service1: Service1) {
        $scope.Items = ["I", "was", "loaded", "synchronously"];
        Service1.GetItems()
            .then((result) => {
                $scope.Items = ["I", "was", "loaded", "asynchronously"];
            });
    }
    return {
        templateUrl: "/apps/components/MyComponent/MyComponent.html",
        controller: controller,
    };
});
As you can see, component comprises of controller and other directive options that drive how your component will function. Components are not required to have controller but we will make that default for our design framework as a standard.
So let’s first create the class to define our component that will act as controller as well.
abstract class BaseComponent<t extends="" iscope=""> {
    static $inject = ["$scope", "ServiceLocator"];
    private serviceLocator: ServiceLocator;
    public Scope: T;
    constructor(scope: T, services: ServiceLocator) {
        this.Scope = scope;
        this.serviceLocator = services;
        this.Init.bind(this);
        this.Init();
    }
    abstract Init(): void;
    Services(): ServiceLocator {
        return this.serviceLocator;
    }
    Parent(): IScope {
        return this.Scope["$parent"] as IScope;
    }
}
That’s great so we have class to act as controller but if you notice that’s not how components are being setup. Angular expects the function that returns definition of the component. We cannot use the above approach to register it as component as we did for services and controllers.
If you really compare Directives and Components are very similar in the way it's setup, the only difference is Components are lightweight and simple form of Directive. But I will consider Directives only approach for our design to support previous versions of Angular and anyway, our end result is going to be much simpler than original Components setup recommended.
Below are the definitions you can define for directives:
interface IDirective {
    compile?: IDirectiveCompileFn;
    controller?: any;
    controllerAs?: string;
    link?: IDirectiveLinkFn | IDirectivePrePost;
    multiElement?: boolean;
    name?: string;
    priority?: number;
    require?: string | string[] | {[controller: string]: string};
    restrict?: string;
    scope?: boolean | Object;
    template?: string | Function;
    templateNamespace?: string;
    templateUrl?: string | Function;
    terminal?: boolean;
    transclude?: boolean | string | {[slot: string]: string};
}
Let’s create interface and include these options there:
interface ICompoenent {
    compile?: ng.IDirectiveCompileFn;
    multiElement?: boolean;
    priority?: number;
    require?: string | string[] | { [controller: string]: string };
    scope?: boolean | Object;
    terminal?: boolean;
    transclude?: boolean | string | { [slot: string]: string };
    template?: string | Function;
}
I did not include some of the properties since those will be automated and some are never really needed. You can add or extend it as you need.
Let's define the decorator to register the component with definition as required by Angular.
function Component(name: string, options: ICompoenent) {
    return (target: Function) => {
        var directiveOptions = options as ng.IDirective;
        directiveOptions.controller = target;
        directiveOptions.scope = (directiveOptions.scope || {});
        directiveOptions.templateUrl =
            (directiveOptions.templateUrl || "/apps/components/" + name + "/" + name + ".html");
        if (target.prototype.Link)
            directiveOptions.link = target.prototype.Link;
        angular.module('portal').directive(name, function () { return directiveOptions; });
    };
}
Here, I’m using pre decided path for all component’s template url. I do not like to define HTML templates inside the code and always tends to have dedicated template in-place for Angular to look for. You can change that behavior, as you like though.
Let's put all these together and see how our final implementation for component looks like:
var option: ICompoenent = {
    transclude: true
};
@Component("MyComponent", option)
class MyComponent extends BaseComponent<IMyComponentScope>{
    Init(): void {
        this.Scope.Items = ["I", "was", "loaded", "synchronously"];
        this.Services().Service1((service) => {
            return service.GetItems()
                .then((result) => {
                    this.Scope.Items = ["I", "was", "loaded", "asynchronously"];
                });
        });
    }
}
That’s it. Now we got the same goodies of controller and services in component as well.
So far, what have we achieved?
- Decorators that will take care of registering your controller, service and components
- No dependency required to provide in constructor
- All dependencies are always available for developer thoughout the application though base implementations
- Developers don’t need to worry about loading services from server, our framework will take care of loading it if it’s not already loaded.
Project Structure
Now that we have our basic framework design ready, we need to structure our project properly.
There are two common structures that I usually follow:
- Default MVC.NET style:
app
    \controller
        \module1
            \module1controller.ts
    \views
        \module1
            \module1view.html
    \services
        \module1
            \module1service.ts
    \components
- Modular structure (Uncle Bob’s screaming architecture):
app
    \module
        \controller
            \modulecontroller.ts
        \views
            \moduleview.html
        \moduleservice.ts
    \components
In the final source code provided with this article, I have used the second one Modular structure.
File Naming Convention
Finally, since our base classes and decorator is doing guess work to decide which view or service to load automatically, we will need to have definite file naming standards in application.
Controller file name:
I generally prefer to name controller with their action, something like: modulename-action.controller.ts
As you can see, module name and action is separated by hypen, that gives an easy understanding by looking at just what this particular file is for.
View file name:
View names follow similar convention: modulename-action.html
Service file name:
I usually have only one service file per module, but you can extend that behavior as you prefer. modulename.service.ts
Putting all this together in an example, our project is structured as:
app
    \employee
        \controller
            \emlpoyee-view.controller.ts
        \views
            \emlpoyee-view.html
        \employee.service.ts
    \components
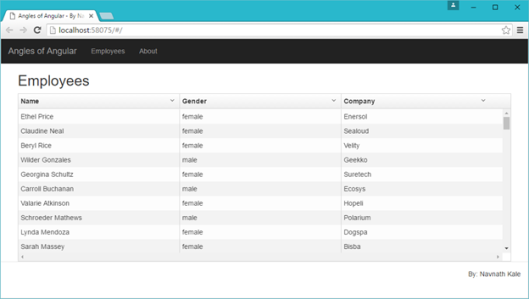
Let’s see how our final working example looks like:
namespace Portal.Employee {
export interface IEmployeeViewScope extends Core.IScope {
GridOptions: uiGrid.IGridOptionsOf<employee.employeeviewmodel>;
}
@Core.Controllers.Controller("Portal.Employee.EmployeeViewController")
export class EmployeeViewController extends Core.Controllers.BaseController<iemployeeviewscope> {
Init(): void {
this.Scope.GridOptions = {};
this.Scope.GridOptions.data = [];
this.Scope.GridOptions.columnDefs = [
{ field: 'name' },
{ field: 'gender' },
{ field: 'company', enableSorting: false }
];
this.Scope.GridOptions.onRegisterApi = (gridApi) => {
this.LoadData();
};
}
LoadData(): void {
this.Services()
.EmployeeService((service) => {
return service.GetAll()
.then((result) => {
this.Scope.GridOptions.data = result;
});
});
}
}
}
namespace Portal.Employee {
export class EmployeeViewModel {
name: string;
gender: string;
company: string;
}
@Core.Services.Service("Portal.Employee.EmployeeService")
export class EmployeeService extends Core.Services.BaseService {
GetAll(): Core.IPromise<array<employeeviewmodel>> {
return this.Http()
.get("https://cdn.rawgit.com/angular-ui/ui-grid.info/gh-pages/data/100.json")
.then((result) => {
return result.data;
});
}
}
}
Some of the topics that I’ll be covering in the next article are already part of the code. Go ahead and explore those features included like:
- Better routing implementation
- Define page title from Route registration itself (not included in code)
- Lazy loading controller’s files as required (not included in code)
- Angular 2 support. No code change required in implementation, another benefit of this approach, developers don’t have to worry if it's Angular 1.5 or 2 working behind.
Please share and comment if you find it useful. Comment if you have any other issues that you want to explore with this approach or any suggestions.
This member has not yet provided a Biography. Assume it's interesting and varied, and probably something to do with programming.


 General
  News
News  Suggestion
  Question
  Bug
Bug  Answer
  Joke
Joke  Praise
  Rant
Rant  Admin
Admin 


