Introduction
Microsoft is allowing students with Dreamspark accounts to have free Azure web hosting. However, using MS SQL Server is not free, but MySQL support is free (for small DBs) in Azure. So for the benefit of all the students who want to write ASP MVC programs and use Azure, I looked into how to do this. Searching the web, there are many articles that have parts of the puzzle, but I could not find a working example. This "Frankenstein" program pulls in bits of code from several articles to create a simple example. I am assuming the reader is familiar with building MVC apps with MS SQL Server, and just wants to know how to swap in MySQL.
Background
A good bit of the primary code came from here, and here and solving the "The Migration History table, __migrationhistory" problem came from here. I strongly suggest you look over those articles if there is code in my project that you don't understand. I didn't repeat all the good words that are in those articles.
Using the Code
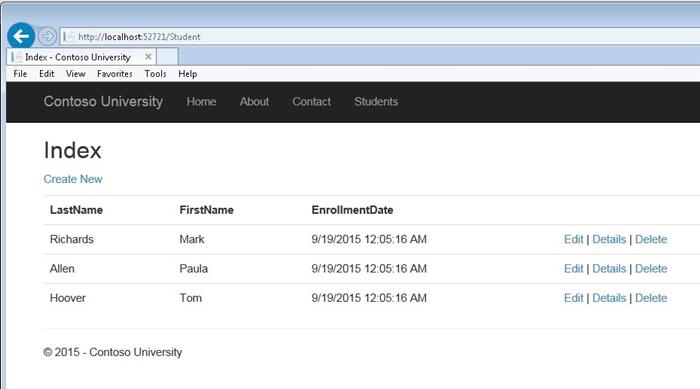
This is a small version of the Contoso University MVC example that shows up in many articles, this one has only students as data to remove clutter and focus on the MySQL connection challenge. As you paste my code, various class references will be undefined, however the new VS2015 works nicely, just right click and select "quick fix" and let VS add the correct Using statements for you. Be very careful with Student and Students. Student is a class and a class file. Students is the DB table. An extra or missing "s" will break the project.
To recreate it, using VS2015, create a new MVC project with no authentication. I suggest using the same project name I did (ContosoMySQLAzure), so that cutting and pasting my code has a better chance of working. Replace the code in the Home Index.cshtm View with this:
@{
    ViewBag.Title = "Home Page";
}

<div class="jumbotron">
    <h1>Contoso University</h1>
</div>
<div class="row">
    <div class="col-md-4">
        <h2>Welcome to Contoso University</h2>
        <p>
            Contoso University is a sample application that
            demonstrates how to use Entity Framework 6 in an
            ASP.NET MVC 5 web application. This one uses MySQL.
        </p>
    </div>

</div>
From the Tools menu, select NuGetPackage Manager and then Package Manager Console. Insert the following command:
>Install-Package MySql.Data.Entity
This loads the Entity Framework code that works with MySQL.
Now create your data model for students by adding a new Student.cs class file in the Model folder:
using System;
using System.Collections.Generic;

namespace ContosoMySQLAzure.Models
{
    public class Student
    {
        public int ID { get; set; }
        public string LastName { get; set; }
        public string FirstName { get; set; }
        public DateTime EnrollmentDate { get; set; }
    }
}
Now create the DB context (class which handles and keeps track of the various Entity Framework operations) by adding a new folder to the project, called DAL, and then create a new SchoolContext.cs class file in that folder.
using ContosoMySQLAzure.Models;
using System.Data.Entity;

namespace ContosoMySQLAzure.DAL
{
    public class SchoolContext : DbContext
    {
        public SchoolContext() : base("SchoolContext")
        {
            Database.SetInitializer<SchoolContext>(new MyDbInitializer());
        }

        public DbSet<Student> Students { get; set; }
    }
}
Add another new class, MyDbInitializer.cs to the DAL folder, this is used to pre-load an empty DB with some test values.
using ContosoMySQLAzure.Models;
using System;
using System.Data.Entity;
namespace ContosoMySQLAzure.DAL
{
public class MyDbInitializer : DropCreateDatabaseAlways<SchoolContext>
{
protected override void Seed(SchoolContext context)
{
context.Students.Add(new Student
{ ID = 1, FirstName = "Mark", LastName = "Richards", EnrollmentDate = DateTime.Now });
context.Students.Add(new Student
{ ID = 2, FirstName = "Paula", LastName = "Allen", EnrollmentDate = DateTime.Now });
context.Students.Add(new Student
{ ID = 3, FirstName = "Tom", LastName = "Hoover", EnrollmentDate = DateTime.Now });
base.Seed(context);
}
}
}
Edit the Web.config file and add a connection string to the Azure based instance of MySQL. I used the Azure Portal to create my MySQL DB. You need to have previously created an Azure MySQL account and have created an empty database named ContosoDataBase. When you create that DB, get and save the connection string, and edit my code below with values appropriate for your account.
<connectionStrings>
    <add name="SchoolContext" providerName="MySql.Data.MySqlClient"
connectionString="Server=us-cdbr-azure-west-c.cloudapp.net; Database=ContosoDataBase;
User Id=xxxxxxxxxxxxxx; Password=xxxxxxxx;" />
</connectionStrings>
Careful: Many of the earlier MySQL EF articles on the web show changes to the <entityFramework> sections in the Web.config file. However, for these current versions of EF, everything else in Web.config worked with no changes required.
Now to enable migrations (if your model changes) and to allow the EF to create the datebase table to hold your student model, you need to do a few more steps. First, again from the Tools menu, select NuGet Package Manager and then Package Manager Console. Insert the following command:
>enable-migrations
This creates a new folder, Migrations and a new class file within, Configuration.
Entity Framework Code First uses Migration History to keep track of model changes and ensure consistency with the database, however the Migration History table, __migrationhistory, has a primary key that is too large for MySql. I got the fix for this from this tip.
Under the migration folder, add a new class named MySqlHistoryContext.cs and add the following code:
using System.Data.Common;
using System.Data.Entity;
using System.Data.Entity.Migrations.History;

namespace ContosoMySQLAzure.Migrations
{
    public class MySqlHistoryContext : HistoryContext
    {
        public MySqlHistoryContext(DbConnection connection, string defaultSchema)
            : base(connection, defaultSchema)
        {

        }

        protected override void OnModelCreating(DbModelBuilder modelBuilder)
        {
            base.OnModelCreating(modelBuilder);
            modelBuilder.Entity<HistoryRow>().Property(h => h.MigrationId).HasMaxLength(100).IsRequired();
            modelBuilder.Entity<HistoryRow>().Property(h => h.ContextKey).HasMaxLength(200).IsRequired();
        }
    }
}
And in this migration folder, change the Configuration.cs file to:
namespace ContosoMySQLAzure.Migrations
{
using DAL;
using System.Data.Entity;
using System.Data.Entity.Migrations;
internal sealed class Configuration : DbMigrationsConfiguration<SchoolContext>
{
public Configuration()
{
AutomaticMigrationsEnabled = false;
SetSqlGenerator("MySql.Data.MySqlClient",
new MySql.Data.Entity.MySqlMigrationSqlGenerator());
SetHistoryContextFactory("MySql.Data.MySqlClient",
(conn, schema) => new MySqlHistoryContext(conn, schema));
}
protected override void Seed(SchoolContext context)
{
}
}
}
Next, create a custom database initializer since the MySQL provider does not support Entity Framework migrations. Add a new class file named MySqlInitializer.cs to the project (not to be confused with the file MyDbInitializer.cs down in the DAL folder), and use this code:
using ContosoMySQLAzure.DAL;
using System.Data.Entity;
using System.Data.Entity.Infrastructure;
using System.Linq;
namespace ContosoMySQLAzure
{
public class MySqlInitializer : IDatabaseInitializer<SchoolContext>
{
public void InitializeDatabase(SchoolContext context)
{
if (!context.Database.Exists())
{
context.Database.Create();
}
else
{
var migrationHistoryTableExists =
((IObjectContextAdapter)context).ObjectContext.ExecuteStoreQuery<int>(
string.Format(
"SELECT COUNT(*) FROM information_schema.tables
WHERE table_schema = '{0}' AND table_name = '__MigrationHistory'",
"ContosoDataBase"));
if (migrationHistoryTableExists.FirstOrDefault() == 0)
{
context.Database.Delete();
context.Database.Create();
}
}
}
}
}
For the this new MySqlInitializer database initializer to work, you need to change the application startup code to register the initializer. Edit Global.asax.cs and add one line in this method:
protected void Application_Start()
{
Database.SetInitializer(new MySqlInitializer());
AreaRegistration.RegisterAllAreas();
FilterConfig.RegisterGlobalFilters(GlobalFilters.Filters);
Now, create an MVC controller to use this data. Right click on the Controller folder and do an Add New Scaffold Item, select and MVC 5 Controller with Views, using Entity Framework. The Model class is Student, the Data Context class is SchoolContext, and the name is StudentController.
Lastly, edit the _Layout.cshtml file to add a link to the new controller:
<ul class="nav navbar-nav">
    <li>@Html.ActionLink("Home", "Index", "Home")</li>
    <li>@Html.ActionLink("About", "About", "Home")</li>
    <li>@Html.ActionLink("Contact", "Contact", "Home")</li>
    <li>@Html.ActionLink("Students", "Index", "Student")</li>
</ul>
It should work now, either locally to the Azure MySQL, or you can push the app to Azure and run it all in the Cloud.
History
October 1, 2015: Added the required change to the Global.asax.cs file and changed the text around here for the MyDbInitializer.cs.
public class MyDbInitializer : DropCreateDatabaseAlways<SchoolContext>
This member has not yet provided a Biography. Assume it's interesting and varied, and probably something to do with programming.


